Carry multiple textbooks in one hand easily and effortlessly
So, I just got Final Cuts Pro 10, THANKS MOM AND MARK!!! I Love it. I used to use Pinnacle Studios 14 and I may still use it for odds and ends that I haven't learned yet how to do with Final Cuts or the intro that I made in Pinnacle I think I'll still use on occasion until I can figure out how to recreate a new one with my new program!! I do Really love Final Cuts and Totally look forward to catching up on editing lots more videos!!
I have been a little let down when I post a video and it is good just not so much crafting or what have you and I get thumbs downs and an overall feeling that I have been unappreciated. I do post these video for the fun. I may be earning revenue and I'm grateful it, however it takes time to earn enough to make it a career. I hope that some day soon my pennies with become dollars. With all that said I decided to add in some entertaining bits of video to keep my viewer's attention. So hope you enjoy and if you are one of my loyal viewers THANKS also if you see one of my videos that have ads PLEASE take the time to check out the ads, they pay the way to my financial freedom! If my videos have ever disappointed you in the past...well I can't apologize for something I am proud of.
I am really PROUD of this video and I hope that you enjoy it and share it with all your friends! Check out the ads on this blog and the videos I post. Thanks to all my fans!!
About this video: In HS I was taking lots of honors classes and I had lots of textbooks I had lots of other things to carry in my backpack and I had back pains from the weight of my bag so it was in my best interest to carry my books rather that put them in my backpack. I had to caver them anyways and there were bags with handles in with the saved brown paper bags and it just clicked. I used this technique two years in a row and never had any problems. I love it. even though My books are smaller now that I'm in college again I still like to carry them this way
THANKS! ALLISON!!
Thursday, August 11, 2011
Thursday, July 28, 2011
Slices of the punk canes for sale!!
So for a limited time, due to the popularity, I am selling the cane slices of the hot pink and black skull and crossbones.
http://www.etsy.com/listing/78686519/skull-crossbones-nail-art-slices-qty-50

http://www.etsy.com/listing/78686519/skull-crossbones-nail-art-slices-qty-50
If there are none left in the shop, contact me and I'll check what I have left!!
Tuesday, July 12, 2011
The craft table's checkerboard and faux techniques - Black Cat Scraps
So, when I'm not doing my usual you tube crafts, I like to work with wood and bulid things. I have framed my basement when we remodled it, I have built a chicken coop and other constrution like tasks. I also love to paint an have always loved the idea of faux painting techniques
Here is the lovely craft table that I have refurbished. It originally was an aviary that I had to take apart to remove it from my old room when I moved out of my parents house. The pieces had been sitting in my garage for years, I finally used the old pieces to made a craft table instead. Since the type of wood was not solid, it is 5 layer plywood like A/B, I think (meaning that one side was an "A" quality and the other side was a "B" quality finish). I didn't want to finish it with varnish or anything like that, I decided to paint it instead.
![]()
![]() I happen to keep my 12 x 12 pattern papers in two Tupperware buckets, like a filing system. The two buckets fit in the hole perfectly and I like having the pattern papers close by. It is a nice way to store my papers. I do have more than the buckets will hold and I am losing some table space, but good thing the buckets fit into the table and the table is quite large.
I happen to keep my 12 x 12 pattern papers in two Tupperware buckets, like a filing system. The two buckets fit in the hole perfectly and I like having the pattern papers close by. It is a nice way to store my papers. I do have more than the buckets will hold and I am losing some table space, but good thing the buckets fit into the table and the table is quite large.
![]()
![]()
Here is the lovely craft table that I have refurbished. It originally was an aviary that I had to take apart to remove it from my old room when I moved out of my parents house. The pieces had been sitting in my garage for years, I finally used the old pieces to made a craft table instead. Since the type of wood was not solid, it is 5 layer plywood like A/B, I think (meaning that one side was an "A" quality and the other side was a "B" quality finish). I didn't want to finish it with varnish or anything like that, I decided to paint it instead.
I'm sure you've notice the hole on the end... it was originally there so that I could have a shallow Tupperware bucket in it so that my birds would have a place for their food bowls. If you birds, they are messy eaters and I always disliked it when they jump in their dish and kick food around, so the Tupperware collects what they kick out and there is no loss of food or mess.![]()


 I happen to keep my 12 x 12 pattern papers in two Tupperware buckets, like a filing system. The two buckets fit in the hole perfectly and I like having the pattern papers close by. It is a nice way to store my papers. I do have more than the buckets will hold and I am losing some table space, but good thing the buckets fit into the table and the table is quite large.
The faux finish looks much neater in person, but that is a given I suppose. For some reason I like checker patterns. They are easy to create and in small amounts or large scale they look really cool. Maybe because they work because you need two colors to make it work and the combinations that can be made and the way they look in that pattern to me is just awesome.


This pic really shows the effect I was going for by stamping both colors instead of having just the white stamped on a blue background. I like it and I am proud of it.
Thursday, July 7, 2011
Black Cat Scraps has some exciting NEWS!!! update
Well I suppose there is really no need to have a video on here if you are just going to be reading anyways but then again you get to read with more entertaining lettering...
Ok so the point of this video was really to announce what has been happening while Black Cat Scraps was taking a mini vacation and Well, It starts like this...
A month before my 25th birthday I made a request/ wish that I wanted to reach 1,000 Subscribers by June 10th. I kinda thought I wouldn't get it and maybe that is why, I knew that I would get at least more than average though. I was sitting at 496 subs or so, I think. So I did do a giveaway for reaching 500 subs. I had a rocky time right before my birthday and really needed some time to just myself. I spent time away from my kids and my husband. I reflected on myself, on where and who I wanted to be. I worked on letting things go, resentment and judgements I passes on people. Personal story short, I grew and I feel I am in a much happier state. I was still really bummed about now reaching my goal and it seemed that I actually lost more subscribers in that month than I did the whole 9 months prior. I understand that some people subscribe and then unsubscribe, it just seemed like I was really getting rained on. It also felt like I was doing all this work for nothing. I had applies for partnership a week or so before my birthday and I was turned down. I knew I wasn't ready yet for it but I was applying for one video in particular, The sexy slit back t-shirt recon. It was reaching 8,000 views and I thought it would be eligible for revenue.
So I was working really hard on my videos, staying up til 3 am to get them finished and posted, not reaching my goal, felt like more people were unsubing, I was turned down for partner, and all the videos that I said I was going to post were all edited and just needed voice over and music, well my editing program crashed and the files were corrupted and now program is very testy. I was really sad. so I thought that it would be best to relax and take a break from posting videos and take a vacation from "play" which started to feel like work.
so, weeks after my birthday when, I started to get my application in for school, and right after my husband and I came back from his second mountain bike race all banged up with a fractured foot, I received an email from You Tube congratulating me and saying I can earn revenue form my videos. Which made me want to make this video announcing the exciting news! I wish it was me in front of the camera instead but it was just easier and faster for me to do it this way.
I am working on getting back on track and playing again. I do feel like the creativity is coming back and I am really excited about school because I am going to take all the art classes they have to offer, not all at once though, and share them with you all. I am also going to take MGD (Multimedia Graphic Design) classes to help improve my video production quality. I do want to earn a degree and maybe a certificate but for mow I will play as long as I can. Degrees come later. So I plan on majoring in Art and major/minor in Videography!
Saturday, May 28, 2011
Where do you hang your shoes?
Do you like to take your shoes off by the couch? Keep things neat?
Do you leave them next to you work out shoes?

 Are they just thrown on the floor?
 Do you find them in weird places?
Have you ever tried hanging them up? I hear it is quite popular.
Do you like to accessorize your shoes with silver?
 Do you normally take your shoes off long before you get home and you tend to leave them on the table with your purse?
Do you look every where for them and then sit down in despair only to find them on the couch?
 How often do you wear your shoes in your ears?
If you would like to purchase these earrings and others like it please visit
http://www.etsy.com/shop/BlackCatScraps
All components are sterling silver. Free shipping to anywhere!
Find me on facebook and youtube - Black Cat Scraps
Love to all
Allison
Thursday, May 26, 2011
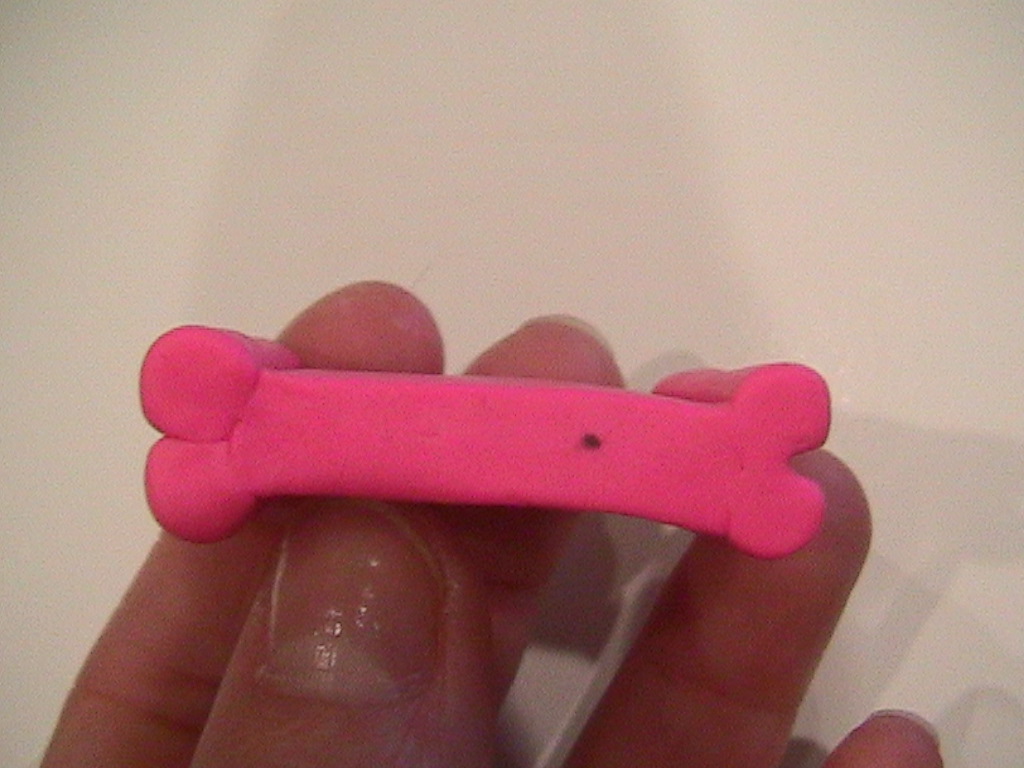
Skull and crossbone Canes
First off what is a cane?
well a cane is a long roll of baked polymer clay that is rolled out to the thickness of a #2 pencil (on average). Canes normally have a design in them if you look at the flat part of the cane ends or slices.
What do you do this a cane?
When a pre-cane is ready to be rolled out the roll is about the size of a plum (for lack of a better fruit) and can be anywhere between an inch to inches long. It depends on how many canes you want when you are done and what you are comfortable working with. You can make different things from different size circles. You can roll your cane out to the size of buttons and slice them the thickness you want, put in your two or four holes and bake. You can use any size roll, slice and add a hole through the side of the cane to make jewelry flat beads. TRADITIONALLY canes are used in nail art. The pencil size cane is sliced very thin, making really thin circles with cute designs in them. Typically you'll see flowers, fruit and a few others.
The first attempt I made at making Fimo (which is a brand of polymer clay) was a flower, hot pink and black. I used Sculpy III clay and I used about a half package total. They turned out alright. I didn't build up the outer layer color and when I rolled it out parts of the flower became the outer wall. I did however do a really good job on the center. I am really proud of that.
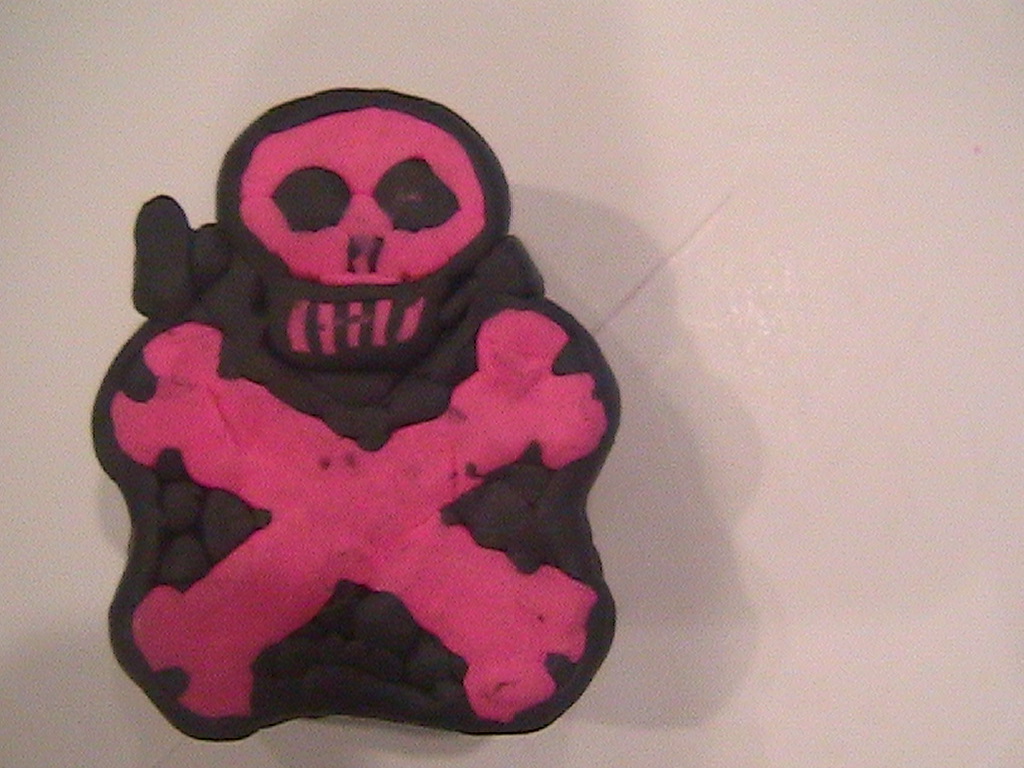
The second attempt was not an attempt because I didn't try I did. So second go was the skull and cross bones. Which for most of the time making it I remembered to that pictures.
So here they are
My skull and crossbones


 |
| Add caption |
 |
| I made a circle and the cut it in half, pushed in the area where the eyes go and then added black rolls |
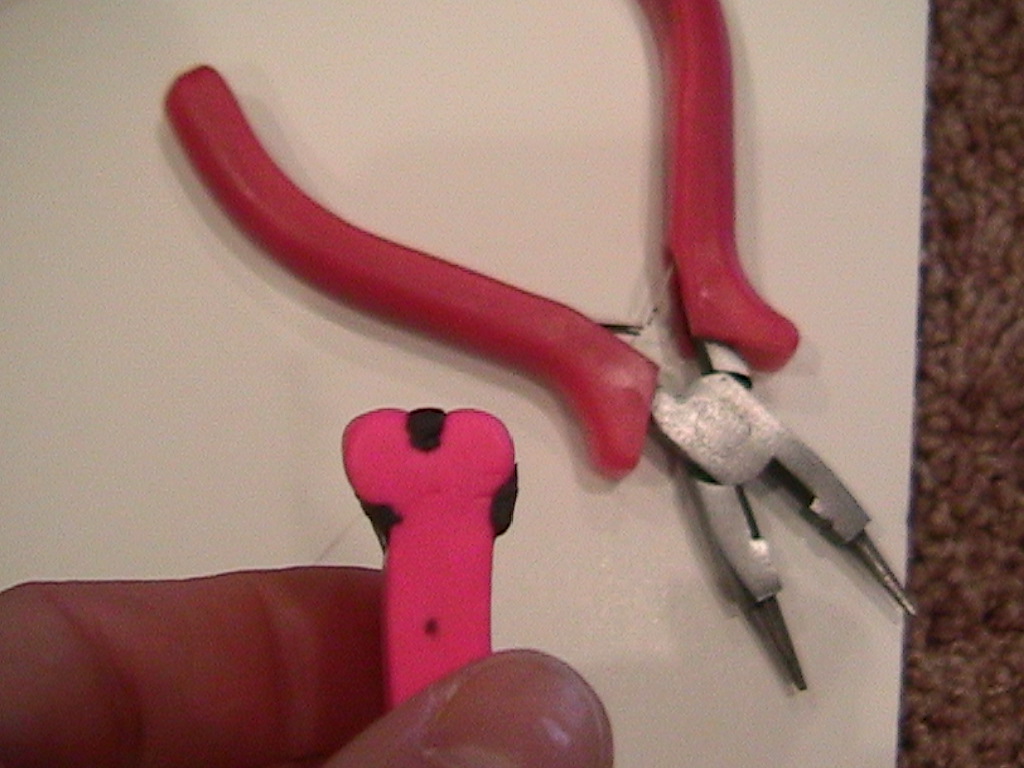
The nose I use a thin black roll and then I added to Pink rolls the same size on making a triangle of the three looking down the rolls. I then shaped it into a triangle. Like the triangle shaped pencils but much smaller.I had the black part of the triangle at the bottom. I also made an indent on the skull piece where the nose would go so it would fit.
For the teeth I flattened out some clay with my
pasta machine black and the hot pink. I layered them alternating colors and then cut it the length of my roll and about 1/4 of an inch wide. I fitted the skull in the area I wanted it. I would fill the empty space around the skull with little rolls of black until mu skull fit where I wanted it with no air spaces. Other wise
 the air space would collapse when I roll it out and the image would be distorted. I the filled the outer parts until I had a circle. I added a thick layer of hot pink to the outer.

 the air space would collapse when I roll it out and the image would be distorted. I the filled the outer parts until I had a circle. I added a thick layer of hot pink to the outer.
 I wish I would have made the crossbones not as thick and I also wish that the clay would be the same color after baking. If the cane is sliced really thin then you get a brighter pink.
 |
| at the end of the cane you will have more distorted images due to the way the clay shapes when it is rolled out. |
 |
| This is baked |
THANKS FOR STOPPING BY! VISIT ME ON YOU TUBE Also see what I am up to with daily facebook posts for   |
The roll on the left is the big roll I am still rolling off from. The image will get better towards the center of the roll. The one on the top right is the average size cane. These are not baked yet |
Tuesday, May 24, 2011
ScrapGenious How to make a Butterfly Fan- The Butterfan
A few ideas for these really cute butterfans.
Besides having them for a scrapbook page or a card you can also make these bigger and have an arrangement of them on a wall. very pretty.
-or-
One year I made the to half a purple and the bottom half a lavender color and had added purple wire for the antena. I added string and gave them to all the separate houses in the family for christmas as a tree ornament! I also made small purple paper bags with a butterfly stamp and filled them with chocolates and Young Living's Lavender chapstick (my favorite by the way!). For my grandma since she getting old and doesn't care to have a tree up any more I made her a butterfan but I added a skewer stick instead so that she could stick it in one of her indoor potted plants. she still has it.
I think I also adde a dangle charm to the "tail" of the butterfan. with beads or something.
Monday, May 23, 2011
closed Giveaway number 2!!!! See the items here!!!
description video
Welcome to my blog! Here Is the items that I am going to give to a very lucky subscriber of Black Cat Scraps channel!!! The entry will be close on
Wednesday JUNE 1st
giveaway rules:
1. be a (loyal) subscribe to my You Tube Channel:
Black cat Scraps!
2. Must be 18 or older or have parent permission
3. Comment must be left on the video's comments on my You Tube channel. Your comment must say what you favorite Black Cat Scraps video was so far!
Open to anyone, world wide!!! if you are in certain countries I may ask for a partial shipping compromise payment. no more that 30% of total shipping costs.
FOR THOSE OF YOU WHO ARE HAVING PROBLEMS COMMENTING ON BLOGGER.
This may help, I think blogger may be having problems though, cause I tried leaving a comment and it gave me the login runaround.
I found a question someone posted regarding a problem posting comments on blogger the answer i found was
"I see that you use Firefox. Do you have third party cookies enabled? In some comment formats, it is necessary to have third party cookies enabled in Firefox."
the person who posted this question said it was the answer so try this if you are having problems.
Wednesday JUNE 1st
giveaway rules:
1. be a (loyal) subscribe to my You Tube Channel:
Black cat Scraps!
2. Must be 18 or older or have parent permission
3. Comment must be left on the video's comments on my You Tube channel. Your comment must say what you favorite Black Cat Scraps video was so far!
 |
| atd serenity stickers |
 |
| Making Memories pattern papers, light weight 4 patterns in size 4"x6" 3 sheets each and 8.5"x11", 1 sheet each DCWV epoxy stickers and rub-ons from Rockstar collection |
 |
| 8.5"x11" Making Memories pattern papers, 40 sheets |
 |
| invisible pattern that pops off page with ink, paint and color wash! |
 |
| 24 rolls of ribbon, 4 ft each roll. by American crafts. |
 |
| Making Memories Blossoms with brads. 75 pieces, 18 pieces, and 16 pieces |
FOR THOSE OF YOU WHO ARE HAVING PROBLEMS COMMENTING ON BLOGGER.
This may help, I think blogger may be having problems though, cause I tried leaving a comment and it gave me the login runaround.
I found a question someone posted regarding a problem posting comments on blogger the answer i found was
"I see that you use Firefox. Do you have third party cookies enabled? In some comment formats, it is necessary to have third party cookies enabled in Firefox."
the person who posted this question said it was the answer so try this if you are having problems.
Monday, May 16, 2011
Sexy slit back and sleeves T-shirt recon by: Black Cat Scraps
y
just wanted to express some thanks to everyone out there in the world who has watched this video Thanks. It is the most popular video on my channel and i am very proud of it.
I really want to make a few more of these but I can't pick which ideas I want to use. Finding the right shirt makes a differences too. I just got a do it.
This idea is really easy to do. there are some shirts that I recommend that you don't use.
shirts that work:
regular cotton T's work great, long sleeve or short sleeve
especially shirts with no side seams
ok shirts to use
elastic type stretch shirts work ok if they are not snug fit.
shirts that don't work
Sweaters
ribbed shirts like A shirts (white wide strapped undershirts)
Tools that make this job easier. Fabric scissors or brand new regular scissors. Fabric requires a sharp edge to cut it so scissors used to cut up paper are too dull a will make working difficult.
a rotary cutter will work too. just put some thing thick or difficult to cut along the edge point where you are cutting to as a stop so that you don't roll too far and cut more than you need.
Sleeve options you can cut the sleeves in several different ways, slits like in the video, you can "knit"(I use the word knit because that is the same concept of what kitting is based off of) the slits or you can leave them alone.
Another way to cut up the sleeves is using a brick pattern. By making one slit and then two small slits like a dashed line parallel to the first slit with the two point of the second row of slits is in the center of the first. just like bricks. You could also cut the sleeves in an altering pattern either on the sides or top of you arm and bottom. so each row is either on the top and the next row is center in the back. you may want to keep the length of the cut for this style short so that it will be easier to put your arm through the sleeve.
If finding a shirt with a graphic design that you like is difficult then you can always get a blank canvas and add fabric paint, dye, spray paint or acrylic paint. even some fruits stain and could help you add some design.
Thanks always for stopping by and see you around!
Friday, May 13, 2011
Are you Too Cute for summer?
It's going to be hot this summer and you may need to wear your hair up to keep cool. Don't pull it up with just anything... Use one of these CUTE fasionalble bows!!! bows and butterflies!
click here to learn more!
Check out the new posts in the shop.
Hand made, great price, no sweat shop here, just a happy artist who is supported by wonderful people!

Click here to see more on this cute bracelet
Like what you see? Give me feed back so that I can keep creating to your likes.!
click here to learn more!
 |
| Collection 2 |
Check out the new posts in the shop.
Hand made, great price, no sweat shop here, just a happy artist who is supported by wonderful people!
 |
| Collection 1 |
Bring out the shorts, No more long sleves and no more jackets! so show off your sexy ankles with cute beaded jewelry. Style up your wrists. Be the talk of your friends, I am.

Like what you see? Give me feed back so that I can keep creating to your likes.!
Friday, May 6, 2011
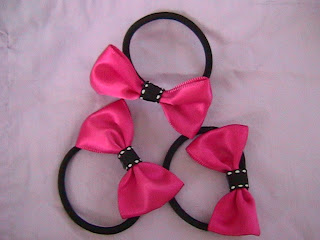
Visit the store and pick up your cute hair bows today! Click HERE
Has you hair style been missing something? Something cute maybe. well take a gander at these cute puppies.

 I made a few of these for myself and I love them. I have worn mine inplace of the normal hair tie and I just feel cute. The girls comment on them all the time. I only use goodie ouchless elastics and I only use them in the hair ties I make. I love these, to make them and play with all the ribbon and to try different styles and color combinations.


Got little girls that love to be princesses? These bows are prefect for that very occasion.

Subscribe to:
Posts (Atom)